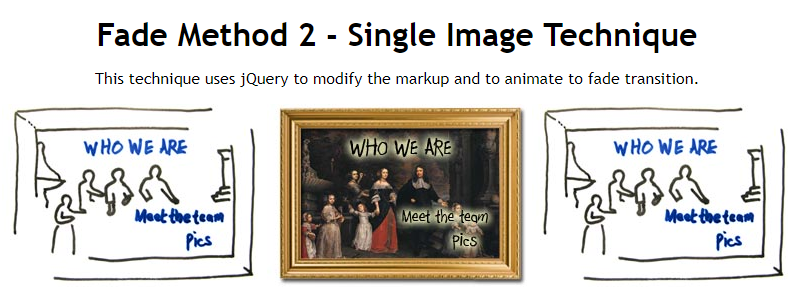
以下是 给图片加相框jquery特效代码 的示例演示效果:
部分效果截图:

HTML代码(index.html):
<!DOCTYPE html>
<html>
<head>
<meta http-equiv="Content-Type" content="text/html; charset=utf-8" />
<title>给图片加相框jquery特效</title>
<style type="text/css" media="screen">
    <!--
        body { margin: 10px; padding: 0; font: 1em "Trebuchet MS", verdana, arial, sans-serif; font-size: 100%; }
        h1 { margin-bottom: 2px; }
    -->
    </style>

    <script type="text/javascript" src="js/jquery.js"></script>

    <script type="text/javascript">
    <!--

    // wrap as a jQuery plugin and pass jQuery in to our anoymous function
    (function ($) {
        $.fn.cross = function (options) {
            return this.each(function (i) {
                // cache the copy of jQuery(this) - the start image
                var $$ = $(this);

                // get the target from the backgroundImage + regexp
                var target = $$.css('backgroundImage').replace(/^url|[\(\)'"]/g, '');

                // nice long chain: wrap img element in span
                $$.wrap('<span style="position: relative;"></span>')
                    // change selector to parent - i.e. newly created span
                    .parent()
                    // prepend a new image inside the span
                    .prepend('<img>')
                    // change the selector to the newly created image
                    .find(':first-child')
                    // set the image to the target
                    .attr('src', target);

                // the CSS styling of the start image needs to be handled
                // differently for different browsers
                if ($.browser.msie || $.browser.mozilla) {
                    $$.css({
                        'position' : 'absolute',
                        'left' : 0,
                        'background' : '',
                        'top' : this.offsetTop
                    });
                } else if ($.browser.opera && $.browser.version < 9.5) {
                    // Browser sniffing is bad - however opera < 9.5 has a render bug
                    // so this is required to get around it we can't apply the 'top' : 0
                    // separately because Mozilla strips the style set originally somehow...
                    $$.css({
                        'position' : 'absolute',
                        'left' : 0,
                        'background' : '',
                        'top' : "0"
                    });
                } else { // Safari
                    $$.css({
                        'position' : 'absolute',
                        'left' : 0,
                        'background' : ''
                    });
                }

                // similar effect as single image technique, except using .animate
                // which will handle the fading up from the right opacity for us
                $$.hover(function () {
                    $$.stop().animate({
                        opacity: 0
                    }, 250);
                }, function () {
                    $$.stop().animate({
                        opacity: 1
                    }, 250);
                });
            });
        };

    })(jQuery);

    // note that this uses the .bind('load') on the window object, rather than $(document).ready()
    // because .ready() fires before the images have loaded, but we need to fire *after* because
    // our code relies on the dimensions of the images already in place.
    $(window).bind('load', function () {
        $('img.fade').cross();
    });

    //-->
    </script>

</head>
<body><center>
    <h1>Fade Method 2 - Single Image Technique</h1>
    <p>This technique uses jQuery to modify the markup and to animate to fade transition.</p>

 <div>
        <img class="fade" src="images/who.jpg" style="background: url(images/who_ro.jpg);" alt="Who we are" />
        <img class="fade" src="images/who.jpg" style="background: url(images/who_ro.jpg);" alt="Who we are" />

        <img class="fade" src="images/who.jpg" style="background: url(images/who_ro.jpg);" alt="Who we are" />
    </div></center>
</body>
</html>


