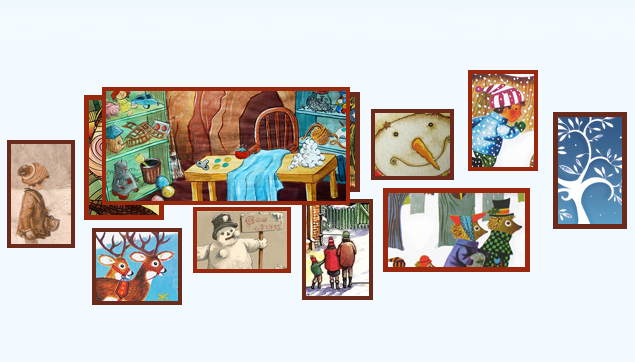
以下是 基于jQuery的图片放大特效代码 的示例演示效果:
部分效果截图:
HTML代码(index.html):
<!DOCTYPE html>

<html>
<head>
<meta http-equiv="Content-Type" content="text/html; charset=utf-8" />
<title>abc</title>

<link rel="stylesheet" type="text/css" href="css/styles.css" />

</head>
<body>

<h1 id="header">
</h1>

<div id="page"></div>

<p id="notes">
<script src="js/jquery-1.4.2.min.js"></script>
<script src="js/script.js"></script>

</body>
</html>
JS代码(script.js):
(function($){
	// Using a self-executing anonymous function,// so that we do not pollute the global space$(document).ready(function(){
	var page= $('#page');
	// Creating the expanding images:var picArr = [new pic({
	top:100,left:30,width:60,height:100,href:'#',img:{
	src:'img/1.jpg',offsetTop:50,offsetLeft:10}
}
),new pic({
	top:55,left:107,width:70,height:115,href:'#',img:{
	src:'img/2.jpg',offsetTop:30,offsetLeft:46}
}
),new pic({
	top:188,left:115,width:82,height:69,href:'#',img:{
	src:'img/3.jpg',offsetTop:10,offsetLeft:36}
}
),new pic({
	top:90,left:198,width:100,height:62,href:'#',img:{
	src:'img/4.jpg',offsetTop:43,offsetLeft:73}
}
),new pic({
	top:52,left:315,width:58,height:90,href:'#',img:{
	src:'img/5.jpg',offsetTop:13,offsetLeft:42}
}
),new pic({
	top:167,left:216,width:90,height:58,href:'#',img:{
	src:'img/6.jpg',offsetTop:0,offsetLeft:13}
}
),new pic({
	top:159,left:325,width:63,height:93,href:'#',img:{
	src:'img/7.jpg',offsetTop:37,offsetLeft:9}
}
),new pic({
	top:148,left:406,width:137,height:74,href:'#',img:{
	src:'img/8.jpg',offsetTop:19,offsetLeft:56}
}
),new pic({
	top:69,left:394,width:75,height:63,href:'#',img:{
	src:'img/9.jpg',offsetTop:56,offsetLeft:54}
}
),new pic({
	top:30,left:491,width:62,height:93,href:'#',img:{
	src:'img/10.jpg',offsetTop:30,offsetLeft:37}
}
),new pic({
	top:72,left:576,width:64,height:107,href:'#',img:{
	src:'img/11.jpg',offsetTop:40,offsetLeft:50}
}
)];
	// Appending the images to the #page div:$.each(picArr,function(){
	page.append(this.elem);
}
);
	// Setting up an event listener for the window.load event.// window.load is executed after all the images have been loaded.$(window).load(function(){
	page.mousemove(function(e){
	var left = (e.pageX - page.offset().left),top = (e.pageY - page.offset().top),pic = null;
	// On each mouse movement,loop through the pics// and check whether the cursor is above any of them.for(var i = 0;
	i < picArr.length;
	i++){
	pic = picArr[i];
	if(pic.near(left,top)){
	if(pic.over(left,top)){
	pic.open();
}
else pic.focus();
}
else pic.close();
}
}
).mouseleave(function(){
	// When the mose leaves the #page div,// foce a close on all the images.for(var i = 0;
	i < picArr.length;
	i++){
	picArr[i].close();
}
}
);
}
);
}
);
	// This is the constructor of the picsfunction pic(options){
	// All the properties of the options object// are copied to the current pic:$.extend(this,options);
	// Creating the markup of the pic,// and storing it in the elem property:this.elem = $('<a>',{
	className:'pic',href:this.href,css:{
	top:this.top,left:this.left,width:this.width,height:this.height}
}
);
	var borderWidth = 5;
	// The bottom and right properties are not passed// as arguments,so we need to calculate them.this.bottom = this.top+this.height+2*borderWidth;
	this.right = this.left+this.width+2*borderWidth;
	this.image = $('<img>',{
	css:{
	left:-this.img.offsetLeft,top:-this.img.offsetTop}
}
);
	var self = this;
	// Appending the image to the body so we can get// its dimensions. After we do this,we remove it// and append it to the markup stored in this.elem:this.image.hide().appendTo('body').load(function(){
	self.img.width = self.image.width();
	self.img.height = self.image.height();
	self.elem.append(self.image.show());
}
).attr('src',this.img.src);
}
// The prototype holds the class methods,// that are common for all objects.pic.prototype ={
	open:function(){
	if(this.opened){
	return false;
}
this.opened = true;
	// Firing our own expand method with a percentage of 100:this.expand(100);
}
,close:function(){
	if(!this.opened && !this.focused){
	return false;
}
this.opened = this.focused = false;
	this.expand(0);
}
,focus:function(){
	if(this.focused || this.opened){
	return false;
}
this.focused = true;
	//Expanding to 30%:this.expand(30);
}
,near:function(x,y){
	// Checking whether the passed x and y coordinates are near the current image:return (x > this.left-15 && x < this.right+15 && y > this.top-15 && y < this.bottom+15);
}
,over:function(x,y){
	// The same,but returning true only when directly above the image:return (x > this.left && x < this.right && y > this.top && y < this.bottom);
}
,expand:function(animPercent){
	if(!this.animateObj){
	this.animateObj ={
	count:0}
;
}
// We use jQuery's animate method to// change the count property of the object:$(this.animateObj).stop().animate({
	count:animPercent}
,{
	duration:150,// The step funciton is executed on every animation frame.// With jQuery's proxy we pass the "this" of the function:step:$.proxy(this.stepAnimation,this)}
);
}
,stepAnimation:function(p,fx){
	// P holds the current value of the count property,// between 0 and 100. Below we are turning into percentage.p = p/100;
	// Changing the size and position of the image holder:this.elem.css({
	width:(this.img.width - this.width)*p + this.width,height:(this.img.height - this.height)*p + this.height,marginTop:-this.img.offsetTop*p,marginLeft:-this.img.offsetLeft*p,zIndex:100*p}
);
	// Moving the image so it appears as if fixed:this.image.css({
	marginLeft:p*this.img.offsetLeft,marginTop:p*this.img.offsetTop}
);
}
}
;
}
)(jQuery);
CSS代码(styles.css):
*{margin:0;padding:0;}
body{background:url('../img/bg.jpg') repeat-x #f3faff;color:#777;font:10px Calibri,Arial,sans-serif;}
#page{width:680px;height:300px;margin:60px auto 80px;position:relative;}
.pic{position:absolute;overflow:hidden;border:4px solid #99280e;text-decoration:none;z-index:0;}
.pic img{position:absolute;border:none;}
.pic:nth-child(2n+1){border-color:#6A2B1C;}
.pic:nth-child(3n+2){border-width:5px;}
/* General styles */
#header{margin:0 auto;width:940px;height:170px;position:relative;}
#header a{background:url('../img/header.png') no-repeat;position:absolute;width:100%;height:100%;top:0;left:0;text-indent:-99999px;overflow:hidden;}
#notes{margin:0 auto;width:630px;text-align:center;}
a,a:visited{text-decoration:underline;outline:none;color:#999;}
a:hover{text-decoration:none;}