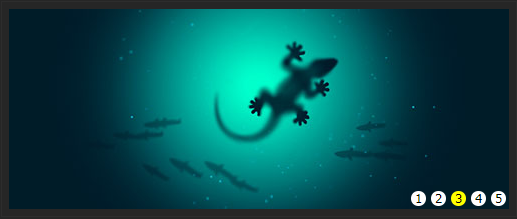
以下是 JS鼠标碰到索引按钮图片切换代码轮播滚动特效 的示例演示效果:
部分效果截图:

HTML代码(index.html):
<!DOCTYPE html PUBLIC "-//W3C//DTD XHTML 1.0 Transitional//EN" "http://www.w3.org/TR/xhtml1/DTD/xhtml1-transitional.dtd">
<html xmlns="http://www.w3.org/1999/xhtml">
<head>
<meta http-equiv="Content-Type" content="text/html; charset=utf-8" />
<title>JS做的焦点轮播图</title>
<style type="text/css">
*{ padding:0; margin:0; list-style:none; border:0;}
body{ background-color: #262626; }
.all{ width: 500px; height: 200px; padding: 7px; border: 1px solid #2D2D2D; margin: 100px auto; position: relative; }
.screen{
	width:500px;
	height:200px;
	 overflow:hidden;
	position:relative;
}
.screen li{ width:500px; height:200px; overflow:hidden; float:left;}
.screen ul{ position:absolute; left:0; top:0px; width:3000px;}
.all ol{ position:absolute; right:10px; bottom:10px; line-height:20px; text-align:center;}
.all ol li{ float: left; width: 15px; height: 15px; background: #fff;  margin-left: 5px; cursor: pointer; font-size: 10px; font-family: Verdana; line-height: 15px; border-radius: 15px; }
.all ol li.current{ background:yellow;}
</style>
<script type="text/javascript">
    window.onload= function() {
        var box  = document.getElementById("all");  //   获得大盒子
        var ul = box.children[0].children[0];  // 获取ul
        var ulLis = ul.children;  //  ul 里面的所有  li
        // 复习:  cloneNode()     克隆节点       追加a.appendChild(b)  把b 放到a 的最后面
        //1.  ulLis[0].cloneNode(true)  克隆  节点
        ul.appendChild(ulLis[0].cloneNode(true));   // ul 是 a   ulLis[0].cloneNode(true) 是b

        //2. 插入 ol 里面的li
        var ol = box.children[1];  // 获得ol
        // 因为 我们要创建很多个 ol 里面的li 所以需要用到for 循环哦
        for(var i=0;i<ulLis.length-1;i++) {   // ul 里面的li  长度 要减去 1  因为我们克隆一个
            // 创建节点 li
            var li = document.createElement("li");
            li.innerHTML = i + 1;   //  存在加1 的关系
            // a.appendChild(b);
            ol.appendChild(li);
        }
        var olLis = ol.children;  // 找到 ol 里面的li
        olLis[0].className = 'current';
        // 3. 动画部分  遍历小li ol
        for(var i=0;i<olLis.length;i++) {
            olLis[i].index = i;  // 赋予索引号
            olLis[i].onmouseover = function() {
                // 清除所有人
                for(var j=0;j<olLis.length;j++) {
                    olLis[j].className = "";
                }
                this.className = 'current';
                animate(ul,-this.index*ulLis[0].offsetWidth);
                key = square = this.index; // 鼠标经过 key square 要等于 当前的索引号
            }
        }
       // 4. 定时器部分  难点
        var timer = null;  // 定时器
        var key = 0; // 用来控制图片的播放的
        var square = 0;  // 用来控制小方块的
        timer = setInterval(autoplay,3000);   // 每隔3s 调用一次 autoplay
        function autoplay() {
            key++;   // key == 1  先 ++
            console.log(key); //  不能超过5
            if(key > ulLis.length - 1)
            {
               // alert('停下');
                ul.style.left = 0;
                key = 1;  // 因为第6张就是第一张,我们已经播放完毕了, 下一次播放第2张
                // 第2张的索引号是1
            }
            animate(ul,-key*ulLis[0].offsetWidth);
            // 小方块的做法
            square++;  // 小方块自加1
            square = square>olLis.length-1 ? 0 : square;
            /// 清除所有人
            for(var i=0;i<olLis.length;i++) {
                olLis[i].className = "";
            }
            olLis[square].className = "current";   // 留下当前自己的

        }


        // 鼠标经过和停止定时器
        box.onmouseover = function() {
            clearInterval(timer);
        }

        box.onmouseout = function() {
            timer = setInterval(autoplay,3000);  // 一定这么开
        }


        //  基本封装
        function animate(obj,target) {
            clearInterval(obj.timer);  // 要开启定时器,先清除以前定时器
            // 有2个参数 第一个 对象谁做动画  第二 距离 到哪里
            // 如果 offsetLeft 大于了  target 目标位置就应该反方向
            var speed = obj.offsetLeft < target ? 15 : -15;
            obj.timer = setInterval(function() {
                var result = target - obj.offsetLeft;  //  他们的值 等于 0 说明完全相等
                // 动画的原理
                obj.style.left = obj.offsetLeft + speed  + "px";
                if(Math.abs(result) <= 15) {
                    obj.style.left = target + "px";   //抖动问题
                    clearInterval(obj.timer);
                }
            },10);
        }

    }
</script>

</head>
<body>
<div class="all" id='all'>
	<div class="screen">
        <ul>
            <li><img src="images/1.jpg" width="500" height="200" /></li>
            <li><img src="images/2.jpg" width="500" height="200" /></li>
            <li><img src="images/3.jpg" width="500" height="200" /></li>
            <li><img src="images/4.jpg" width="500" height="200" /></li>
            <li><img src="images/5.jpg" width="500" height="200" /></li>
        </ul>
    </div>
    <ol>
    </ol>
</div>
</body>
</html>
JS代码(animate.My.js):
/** * Created by Xnew on 2016/8/25. */
//animate 动画// step 步长// 目标位置function animate(obj,target){
	clearInterval(obj.timer);
	var step = obj.offsetLeft < target ? +10:-10;
	obj.timer = setInterval(function(){
	obj.style.left = obj.offsetLeft + step + "px";
	//console.log(Math.abs(target - obj.offsetLeft));
	if(Math.abs(target - obj.offsetLeft) <= 10){
	obj.style.left = target + "px";
	clearInterval(obj.timer);
}
}
,10)}


